MASTG-KNOW-0077: App Permissions
iOS permissions work differently from Android. On Android, permissions are declared in a manifest and granted at install time or via runtime prompts. On iOS, access control is a layered model that is worth understanding before diving into individual checks.
All third-party iOS apps run under the non-privileged mobile user and are sandboxed via policies enforced by the Trusted BSD (MAC) Mandatory Access Control Framework. This baseline sandboxing is not the same as "permissions": it applies to every app automatically, without any developer configuration or user interaction. Access to resources beyond the sandbox is controlled through three distinct mechanisms (entitlements, purpose strings, and runtime authorization), each of which is described in the sections below.
A practical consequence of this model is that not all "permissions" are visible to or granted by the user. Some are purely developer-side configuration that takes effect at install time (e.g. enabling Data Protection or Keychain Sharing via entitlements), while others require an explicit user prompt at runtime. Resources that require a runtime authorization prompt include camera, microphone, location, contacts, calendar, photos, health, Bluetooth, motion, and speech recognition, among others.
Because the user can grant or revoke access at any time in Settings, apps typically check the current authorization status before accessing a protected resource. Each framework exposes a dedicated API for this, for example CLLocationManager.authorizationStatus for location, AVCaptureDevice.authorizationStatus(for:) for camera and microphone, CNContactStore.authorizationStatus(for:) for contacts, PHPhotoLibrary.authorizationStatus(for:) for photos, and CBManager.authorization for Bluetooth. These APIs are useful runtime trace points for determining which protected resource permission paths the app reaches. Resource-specific access APIs provide additional context about whether and how the app uses the protected resource.
Even though Apple urges developers to protect user privacy and to be very clear on how to ask permissions, it can still be the case that an app requests too many of them for non-obvious reasons.
Verifying the use of some permissions such as Camera, Photos, Calendar Data, Motion, Contacts or Speech Recognition should be pretty straightforward as it should be obvious if the app requires them to fulfill its tasks. Let's consider the following examples regarding Photos access. Full read/write authorization gives the app access to the user's Photos library, while iOS 14 and later also support limited library access, where the user selects specific assets, and PhotoKit differentiates read/write access from add-only access:
- The typical QR Code scanning app obviously requires the camera to function but might be requesting the photos permission as well. If storage is explicitly required, and depending on the sensitivity of the pictures being taken, these apps might better opt to use the app sandbox storage to avoid other apps (having the photos permission) to access them.
- Some apps require photo uploads (e.g. for profile pictures). Use
PHPickerViewController(iOS 14+) orPhotosPicker(iOS 16+, SwiftUI). These APIs run in a separate process and give the app read-only access exclusively to the images selected by the user, rather than the entire photo library. This is the preferred approach to avoid requesting unnecessary permissions.
Verifying other permissions like Bluetooth or Location require a deeper source code inspection. They may be required for the app to properly function but the data being handled by those tasks might not be properly protected.
When collecting or simply handling (e.g. caching) sensitive data, an app should provide proper mechanisms to give the user control over it, e.g. to be able to revoke access or to delete it. However, sensitive data might not only be stored or cached but also sent over the network. In both cases, it has to be ensured that the app properly follows the appropriate best practices, which in this case involve implementing proper data protection and transport security. More information on how to protect this kind of data can be found in the chapter "Network APIs".
As you can see, using app capabilities and permissions mostly involve handling personal data, therefore being a matter of protecting the user's privacy. See the articles "Protecting the User's Privacy" and "Requesting Access to Protected Resources" in Apple Developer Documentation for more details.
There is a visual way to inspect the status of some app permissions when using the iPhone/iPad by opening "Settings" and scrolling down until you find the app you're interested in. When clicking on it, this will open the "ALLOW APP_NAME TO ACCESS" screen. However, not all protected resource categories may be displayed before the app requests access. You may need to trigger the relevant flow before the category appears on that screen.
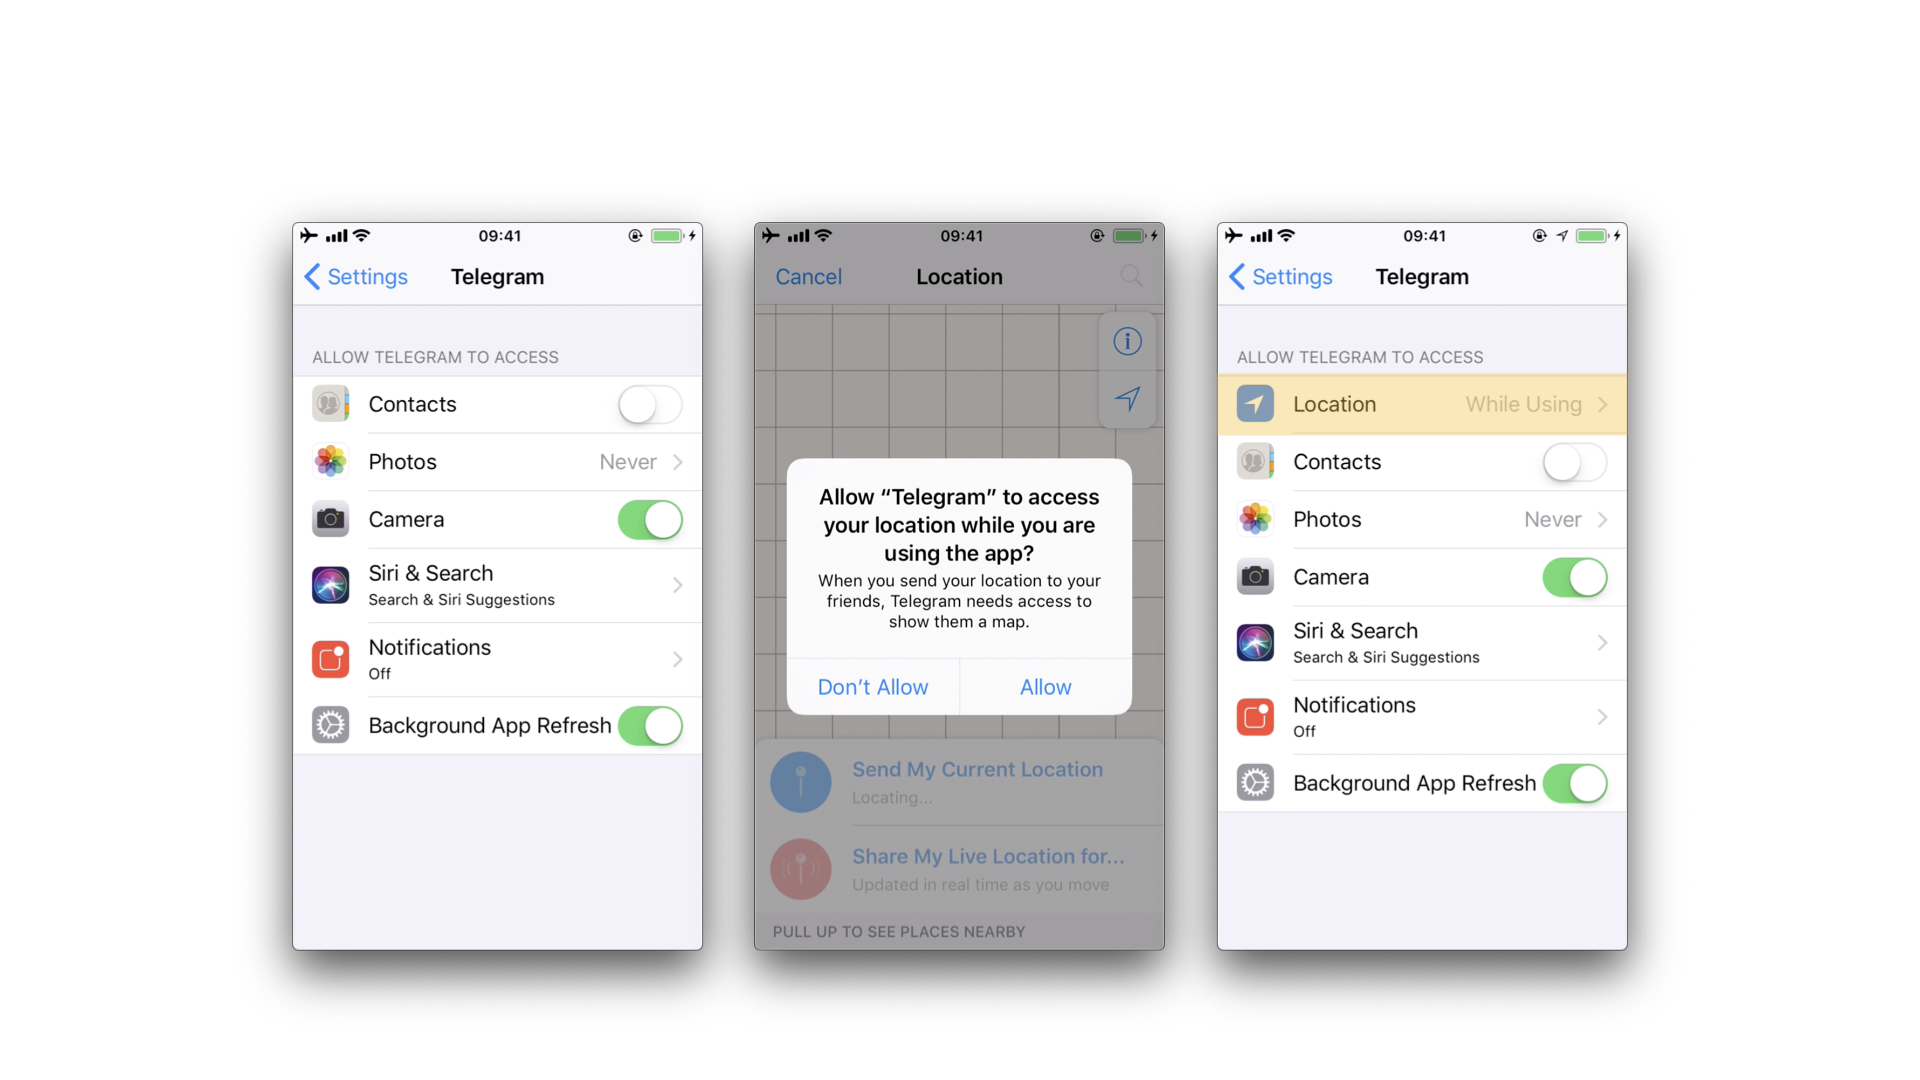
For example, when an app requests "Location" access, the entry was not being listed until we triggered the permission dialogue for the first time. Once we did it, no matter if we allowed the access or not, the "Location" entry will be displayed.
Permission Model Overview
Current iOS releases combine multiple layers that are easy to confuse during review:
- Usage description strings (purpose strings) in
Info.plist, which explain protected-resource access to the user and are required before the system will show an authorization prompt. - Entitlements, signed key-value pairs that enable access to specific platform services or cross-app data sharing.
- Authorization requests at runtime, where the system prompts the user to grant or deny access to a specific resource.
When reviewing app permissions, inspect all of these layers together. A feature may require a usage description, an entitlement, both, or neither depending on which API the app uses.
Apple increasingly provides user-selected or reduced-scope alternatives to broad library access. For example, photo selection flows can often use PHPickerViewController or PhotosPicker, and many location-driven features can work with when in use access instead of persistent background access.
Usage Description Strings (Purpose Strings) in Info.plist
Usage description strings (also called purpose strings) are custom texts that are offered to users in the system's permission request alert when requesting permission to access protected data or resources. Apple's Tech Talk "Write clear purpose strings" covers best practices and common App Store rejection reasons related to insufficient or unclear purpose strings.
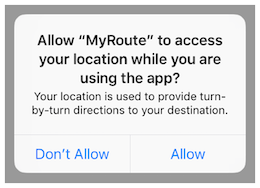
If linking on or after iOS 10, developers are required to include purpose strings in their app's Info.plist file. The purpose string should be accurate, meaningful, and specific about why the app needs access to the protected resource. If an app attempts to access a protected resource without the corresponding purpose string, the request can fail and, for some protected resources, the app might crash.
For an overview of the currently supported purpose string Info.plist keys, use Apple's Protected Resources documentation, which lists each protected resource alongside its required usage description key and the corresponding API.
Mapping Purpose Strings to Framework APIs
Usage description keys and runtime APIs are separate parts of the iOS permission model. Usage description keys provide the user-facing text that iOS displays when an app requests access to a protected resource. Runtime APIs request or check authorization state and access the protected resource through the relevant framework.
The following examples map common protected resources to their Info.plist keys and representative framework APIs:
Runtime traces can include authorization request APIs, authorization status APIs, and resource-specific access APIs. Observing an authorization status API shows that the app reaches the permission layer for that protected resource; observing resource access APIs adds context about how the protected resource is used.
A declared usage description key alone does not prove that the app accesses the protected resource, and a referenced API alone does not prove that the code path is reachable. Review purpose strings, static API references, runtime traces, app features, and user-triggered flows together to determine whether protected resource access is justified.
Entitlements
Entitlements are key-value pairs that grant an executable permission to use a service or technology, such as access to iCloud, HealthKit, push notifications, or the ability to share data with other apps. Because they are embedded in the code signature, they cannot be modified after signing.
Some entitlements take effect silently at install time (e.g. Data Protection, Keychain Sharing), while others additionally require a runtime authorization prompt before the user's data can be accessed. HealthKit is a clear example of this layered model: setting up HealthKit requires enabling the HealthKit capability in Xcode (which adds the com.apple.developer.healthkit entitlement), adding NSHealthShareUsageDescription and/or NSHealthUpdateUsageDescription purpose strings to Info.plist, and then requesting authorization at runtime via HKHealthStore. Adding the entitlement alone is not sufficient.
Mapping Capabilities and Entitlements to Runtime APIs
Xcode capabilities and signed entitlements are related, but they are not the same artifact. A capability is the project-level configuration in Xcode's Signing & Capabilities tab. When you add a capability to an app, Xcode may update the app's Entitlements file, Info.plist, linked frameworks, and signing assets. The entitlement is the key-value entry that is signed into the app binary.
An entitlement is not a runtime method call. It enables a platform service, relaxes a sandbox restriction for that service, or declares participation in a system integration. App code then interacts with that service through framework APIs, shared containers, or system-delivered entry points. Some services add a user authorization layer on top of the entitlement; others are entirely developer-side configuration.
Common privacy-relevant examples include:
- HealthKit: the
com.apple.developer.healthkitentitlement indicates that the app may request authorization for HealthKit data. Some data categories, such as clinical records, use the additionalcom.apple.developer.healthkit.accessentitlement. Runtime code usesHKHealthStoreAPIs such asrequestAuthorization(toShare:read:completion:),authorizationStatus(for:), andexecute(_:)with specificHKObjectTypeorHKSampleTypevalues. - App Groups: the
com.apple.security.application-groupsentitlement lists the groups an app belongs to. Code commonly reaches the shared file container throughFileManager.containerURL(forSecurityApplicationGroupIdentifier:)or shared preferences throughUserDefaults.init(suiteName:). - iCloud and CloudKit: iCloud configuration can include
com.apple.developer.icloud-container-identifiers,com.apple.developer.icloud-services, and related iCloud entitlements. Runtime access to CloudKit containers goes throughCKContainer, includingCKContainer.init(identifier:), which requires the requested container identifier to be present in the app's iCloud container entitlement. - HomeKit: the
com.apple.developer.homekitentitlement indicates that the app may manage HomeKit-compatible accessories. Runtime code usesHMHomeManager, and HomeKit exposes the current access state throughHMHomeManager.authorizationStatus. - NFC Tag Reading: the
com.apple.developer.nfc.readersession.formatsentitlement lists the NFC formats an app can read. Core NFC code uses reader session classes such asNFCTagReaderSessionandNFCNDEFReaderSession. - Associated Domains: the
com.apple.developer.associated-domainsentitlement lists service/domain pairs for features such as Universal Links, shared web credentials, Handoff, and App Clips. Universal Links reach the app as anNSUserActivitywithNSUserActivityTypeBrowsingWeb, delivered through app or scene continuation handlers. - Multicast Networking: the
com.apple.developer.networking.multicastentitlement allows IP multicast and broadcast traffic on iOS and arbitrary Bonjour browsing or advertising. Network framework code may use APIs such asNWConnectionGroupfor multicast communication. - Siri: the
com.apple.developer.sirientitlement applies to apps or extensions that handle Siri requests other than shortcut requests. The corresponding code surface may be an Intents extension, for exampleINIntentHandlerProviding.handler(for:), or modernApp Intentsintegrations depending on the app's Siri support model.
In practice, entitlements end up in the app from two places: the Xcode "Signing & Capabilities" tab (which writes them to the .entitlements file and merges them into the provisioning profile), or directly into the .entitlements file by the developer. At build time they are signed into the app binary's code signature, which is the most reliable place to read them back from a distributed app (see Extracting Entitlements from MachO Binaries). For example, enabling Data Protection in Xcode writes:
<key>com.apple.developer.default-data-protection</key>
<string>NSFileProtectionComplete</string>
The embedded.mobileprovision file is another place where entitlements can appear (nested under a top-level <key>Entitlements</key> dictionary) when the packaged app includes a provisioning profile, such as development, ad-hoc, enterprise, or App Store submission builds before App Store processing. App Store-distributed apps are re-signed during App Store processing and do not include an embedded provisioning profile. It is absent in several common situations:
- Simulator builds, which are not signed with a provisioning profile.
- Pseudo-signed or ad-hoc-signed builds produced by tooling such as ldid, where entitlements are written directly into the binary's code signature without a profile.
For this reason, extracting entitlements from the app binary ( Extracting Entitlements from MachO Binaries) works in more cases than relying on embedded.mobileprovision. When the profile is present, you can additionally inspect it (it is Cryptographic Message Syntax-encoded, not a plain plist) to confirm the entitlements that were granted at signing time.
It is always good practice to check all entitlements present in an app, as it may request more than it needs and thereby expose sensitive data or cross-app attack surface.
Code Signing Entitlements File
Certain capabilities require a code signing entitlements file (<appname>.entitlements). It is automatically generated by Xcode but may be manually edited and/or extended by the developer as well.
Here is an example of entitlements file of the open source app Telegram including the App Groups entitlement (application-groups):
<?xml version="1.0" encoding="UTF-8"?>
<!DOCTYPE plist PUBLIC "-//Apple//DTD PLIST 1.0//EN" "http://www.apple.com/DTDs/PropertyList-1.0.dtd">
<plist version="1.0">
<dict>
...
    <key>com.apple.security.application-groups</key>
    <array>
        <string>group.ph.telegra.Telegraph</string>
    </array>
</dict>
...
</plist>
The entitlement outlined above does not require any additional permissions from the user. However, it is always good practice to review all entitlements, because unnecessary entitlements can increase the app's cross-app data sharing surface or enable access to platform services the app does not need.
The App Groups entitlement is required to share information between different apps through IPC or a shared file container, which means that data can be shared on the device directly between the apps. This entitlement is also required if an app extension requires to share information with its containing app.
Depending on the to-be-shared data, it might be more appropriate to share it using another method such as through a backend where this data could be potentially verified, avoiding tampering by e.g. the user themselves.
Xcode Capabilities
Xcode Capabilities are features/services you enable for your app that require entitlements and provisioning profile configuration, such as Push Notifications, iCloud, In-App Purchase, Apple Pay, Sign in with Apple, Game Center, etc. They are configured in Xcode's "Signing & Capabilities" tab and generate entitlements in the app's .entitlements file. When reviewing an IPA, the resulting entitlements are visible in the app binary's code signature. They may also appear in embedded.mobileprovision when the IPA includes a provisioning profile, such as development, ad-hoc, enterprise, or pre-App Store processing builds.
!!! "note" The terms "capabilities" and "entitlements" are often used interchangeably but refer to different things: Capabilities is the Xcode UI concept (the toggle you enable); entitlements are the resulting key-value pairs in the signed artifact. When reviewing an IPA, you are always looking at entitlements, as the Xcode capabilities that produced them are not visible in the build output.
Required Device Capabilities
UIRequiredDeviceCapabilities (in Info.plist) tells the App Store what hardware or software features the device must have to run your app at all. Examples: arkit, camera-flash, gps, nfc, gyroscope, metal, etc. It is used to filter out incompatible devices on the App Store, so users on devices lacking those capabilities simply won't see or be able to install your app. See Apple's Required Device Capabilities page for the full list of supported values.
Unlike entitlements, required device capabilities do not confer any right or access to protected resources. Additional configuration steps might be required depending on each capability.
For example, an app such as NFC TagInfo by NXP is completely dependent on NFC to work, so it includes nfc in its UIRequiredDeviceCapabilities. This means that users on devices without NFC (e.g. iPhone 6) won't even see the app on the App Store, while users on compatible devices (e.g. iPhone 7 and later) can install it and use its features.
If BLE is a core feature of the app, there are several layers to consider:
- The
bluetooth-ledevice capability can be set inUIRequiredDeviceCapabilitiesto restrict non-BLE capable devices from downloading the app. bluetooth-centralorbluetooth-peripheralcan be added toUIBackgroundModesif BLE background processing is required.NSBluetoothAlwaysUsageDescriptionis required for Core Bluetooth access in apps linked on or after iOS 13.