MASTG-TECH-0056: Installing Apps
When you install an application without using Apple's App Store, this is called sideloading. There are various ways of sideloading which are described below. On the iOS device, the actual installation process is then handled by the installd daemon, which will unpack and install the application. To integrate app services or be installed on an iOS device, all applications must be signed with a certificate issued by Apple. This means that the application can be installed only after successful code signature verification, which is explained in Signing IPA files.
Disabling Signature Verification (optional): On a jailbroken device, you can bypass the signature verification requirement using AppSync Unified, which hooks the appropriate system daemon and disables signature verification for any installations you do with the tools listed below while it's enabled.
Different methods exist for installing an IPA package onto an iOS device, which are described in detail below.
Sideloadly
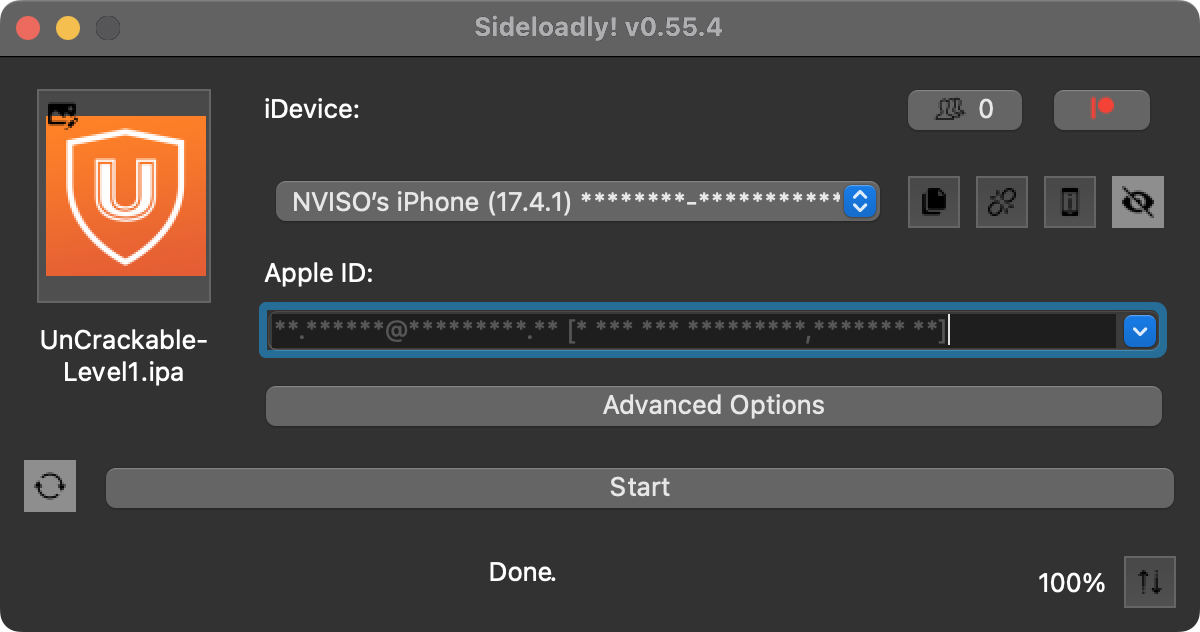
Sideloadly is a GUI tool that can automate all required steps for you. It requires valid Apple developer credentials, as it will obtain a valid signature from Apple servers.
Simply connect your device via USB, enter your Apple ID and drag-and-drop the IPA file onto SideLoadly. Click start to automatically sign and install the given IPA.

libimobiledevice
On Linux and also macOS, you can alternatively use libimobiledevice suite. This allows you to install apps over a USB connection by executing ideviceinstaller. The connection is implemented with the USB multiplexing daemon usbmuxd, which provides a TCP tunnel over USB.
Let's install the iGoat-Swift app with the following command:
$ ideviceinstaller -i Uncrackable.ipa
...
Install: Complete
Filza
Filza allows you to install an IPA file which is already located on your device. You can use either scp ( Host-Device Data Transfer) or AirDrop to copy the IPA file to your device, after which you can simply navigate to the IPA file on your file system and click the Install button in the top right corner.
ipainstaller
The IPA can also be directly installed on the iOS device via the command line with ipainstaller. Naturally, this requires a jailbroken device, as otherwise you cannot SSH into the device. After copying the file over to the device, for example via scp ( Host-Device Data Transfer) or AirDrop, you can execute ipainstaller with the IPA's filename:
ipainstaller Uncrackable.ipa
ios-deploy
On macOS you can also use the ios-deploy tool to install iOS apps from the command line. You'll need to unzip your IPA since ios-deploy uses the app bundles to install apps.
unzip UnCrackable.ipa
ios-deploy --bundle 'Payload/UnCrackable Level 1.app' -W -v
xcrun
After installing Xcode Command Line Tools, you can execute the following command to install a signed IPA:
# Get the correct device id
$ xcrun devicectl list devices
Devices:
Name                 Hostname                                     Identifier                             State                Model
------------------   ------------------------------------------   ------------------------------------   ------------------   ------------------------------
Foobar               00008101-00FF28803FF9001E.coredevice.local   ABD1F3D8-7BC1-52CD-8DB6-9BFD794CE862   available (paired)   iPhone 14 Pro Max (iPhone15,3)

$ xcrun devicectl device install app --device 00008101-00FF28803FF9001E ~/signed.ipa
11:59:04  Acquired tunnel connection to device.
11:59:04  Enabling developer disk image services.
11:59:04  Acquired usage assertion.
4%... 12%... 28%... 30%... 31%... 32%... 33%... 35%... 36%... 37%... 39%... 40%... 42%... 43%... 45%... 49%... 51%... 52%... 54%... 55%... 57%... 59%... 60%... 62%... 66%... 68%... 72%... 76%... 80%... 84%... 88%... 92%... 96%... Complete!
App installed:
• bundleID: org.mas.myapp
• installationURL: file:///private/var/containers/Bundle/Application/DFC99D25-FC36-462E-91D2-18CDE717ED21/UnCrackable%20Level%201.app/
• launchServicesIdentifier: unknown
• databaseUUID: DA52A5EB-5D39-4628-810E-8F42A5561CDF
• databaseSequenceNumber: 1516
• options:
Xcode
It is also possible to use the Xcode IDE to install iOS apps by executing the following steps:
- Start Xcode
- Select Window/Devices and Simulators
- Select the connected iOS device and click on the + sign in Installed Apps.
Allow Application Installation on a Non-iPad Device
Sometimes an application can require to be used on an iPad device. If you only have iPhone or iPod touch devices then you can force the application to accept to be installed and used on these kinds of devices. You can do this by changing the value of the property UIDeviceFamily to the value 1 in the Info.plist file.
<?xml version="1.0" encoding="UTF-8"?>
<!DOCTYPE plist PUBLIC "-//Apple//DTD PLIST 1.0//EN" "http://www.apple.com/DTDs/PropertyList-1.0.dtd">
<plist version="1.0">
<dict>

  <key>UIDeviceFamily</key>
  <array>
    <integer>1</integer>
  </array>

</dict>
</plist>
Note that changing this value will break the original signature, so you must re-sign the IPA ( Signing IPA files) to install it on a device that does not have signature validation disabled.
This bypass might not work if the application requires capabilities that are specific to modern iPads while your iPhone or iPod is a bit older.
Possible values for the property UIDeviceFamily can be found in the Apple Developer documentation.