MASTG-TEST-0069: Testing App Permissions
This test will be updated soon
The test can be used in its current form, but it will receive a complete overhaul as part of the new OWASP MASTG v2 guidelines.
Help us out by submitting a PR for: MASTG v1->v2 MASTG-TEST-0069: Testing App Permissions (ios)
Overview
Static Analysis
Since iOS 10, these are the main areas which you need to inspect for permissions:
- Purpose Strings in the Info.plist File
- Code Signing Entitlements File
- Embedded Provisioning Profile File
- Entitlements Embedded in the Compiled App Binary
- Usage of Permissions in Source Code
Purpose Strings in the Info.plist File
If having the original source code, you can verify the permissions included in the Info.plist file:
- Open the project with Xcode.
- Find and open the
Info.plistfile in the default editor and search for the keys starting with"Privacy -".
You may switch the view to display the raw values by right-clicking and selecting "Show Raw Keys/Values" (this way for example "Privacy - Location When In Use Usage Description" will turn into NSLocationWhenInUseUsageDescription).

If only having the IPA:
- Unzip the IPA.
- The
Info.plistis located inPayload/<appname>.app/Info.plist. - Convert it if needed (e.g.
plutil -convert xml1 Info.plist) as explained in the chapter "iOS Basic Security Testing", section "The Info.plist File". -
Inspect all purpose strings Info.plist keys, usually ending with
UsageDescription:<plist version="1.0"> <dict> <key>NSLocationWhenInUseUsageDescription</key> <string>Your location is used to provide turn-by-turn directions to your destination.</string>
For each purpose string in the Info.plist file, check if the permission makes sense.
For example, imagine the following lines were extracted from a Info.plist file used by a Solitaire game:
<key>NSHealthClinicalHealthRecordsShareUsageDescription</key>
<string>Share your health data with us!</string>
<key>NSCameraUsageDescription</key>
<string>We want to access your camera</string>
It should be suspicious that a regular solitaire game requests this kind of resource access as it probably does not have any need for accessing the camera nor a user's health-records.
Apart from simply checking if the permissions make sense, further analysis steps might be derived from analyzing purpose strings e.g. if they are related to storage sensitive data. For example, NSPhotoLibraryUsageDescription can be considered as a storage permission giving access to files that are outside of the app's sandbox and might also be accessible by other apps. In this case, it should be tested that no sensitive data is being stored there (photos in this case). For other purpose strings like NSLocationAlwaysUsageDescription, it must be also considered if the app is storing this data securely. Refer to the "Testing Data Storage" chapter for more information and best practices on securely storing sensitive data.
Embedded Provisioning Profile File
When you do not have the original source code, you should analyze the IPA and search inside for the embedded provisioning profile that is usually located in the root app bundle folder (Payload/<appname>.app/) under the name embedded.mobileprovision.
This file is not a .plist, it is encoded using Cryptographic Message Syntax. On macOS you can inspect an embedded provisioning profile's entitlements using the following command:
security cms -D -i embedded.mobileprovision
and then search for the Entitlements key region (<key>Entitlements</key>).
Entitlements Embedded in the Compiled App Binary
If you only have the app's IPA or simply the installed app on a jailbroken device, you normally won't be able to find .entitlements files. This could also be the case for the embedded.mobileprovision file. Still, you should be able to extract the entitlements property lists from the app binary yourself (see Extracting Entitlements from MachO Binaries).
Usage of Permissions in Source Code
After having checked the <appname>.entitlements file and the Info.plist file, it is time to verify how the requested permissions and assigned capabilities are put to use. For this, a source code review should be enough. However, if you don't have the original source code, verifying the use of permissions might be specially challenging as you might need to reverse engineer the app, refer to the "Dynamic Analysis" for more details on how to proceed.
When doing a source code review, pay attention to:
- whether the purpose strings in the
Info.plistfile match the programmatic implementations. - whether the registered capabilities are used in such a way that no confidential information is leaking.
Users can grant or revoke authorization at any time via "Settings", therefore apps normally check the authorization status of a feature before accessing it. This can be done by using dedicated APIs available for many system frameworks that provide access to protected resources.
You can use the Apple Developer Documentation as a starting point. For example:
- Bluetooth: the
stateproperty of theCBCentralManagerclass is used to check system-authorization status for using Bluetooth peripherals. -
Location: search for methods of
CLLocationManager, e.g.locationServicesEnabled.func checkForLocationServices() { if CLLocationManager.locationServicesEnabled() { // Location services are available, so query the user's location. } else { // Update your app's UI to show that the location is unavailable. } }See Table1 in "Determining the Availability of Location Services" (Apple Developer Documentation) for a complete list.
Go through the application searching for usages of these APIs and check what happens to sensitive data that might be obtained from them. For example, it might be stored or transmitted over the network, if this is the case, proper data protection and transport security should be additionally verified.
Dynamic Analysis
With help of the static analysis you should already have a list of the included permissions and app capabilities in use. However, as mentioned in "Source Code Inspection", spotting the sensitive data and APIs related to those permissions and app capabilities might be a challenging task when you don't have the original source code. Dynamic analysis can help here getting inputs to iterate onto the static analysis.
Following an approach like the one presented below should help you spotting the mentioned sensitive data and APIs:
- Consider the list of permissions / capabilities identified in the static analysis (e.g.
NSLocationWhenInUseUsageDescription). - Map them to the dedicated APIs available for the corresponding system frameworks (e.g.
Core Location). You may use the Apple Developer Documentation for this. - Trace classes or specific methods of those APIs (e.g.
CLLocationManager), for example, usingfrida-trace. - Identify which methods are being really used by the app while accessing the related feature (e.g. "Share your location").
- Get a backtrace for those methods and try to build a call graph.
Once all methods were identified, you might use this knowledge to reverse engineer the app and try to find out how the data is being handled. While doing that you might spot new methods involved in the process which you can again feed to step 3. above and keep iterating between static and dynamic analysis.
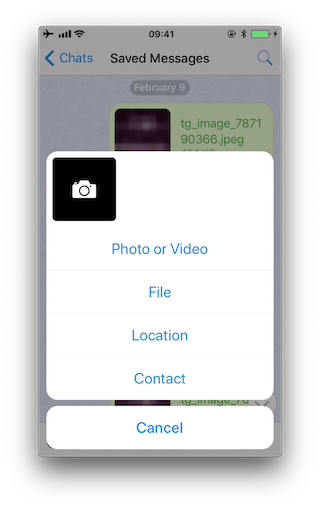
In the following example we use Telegram to open the share dialog from a chat and frida-trace to identify which methods are being called.
First we launch Telegram and start a trace for all methods matching the string "authorizationStatus" (this is a general approach because more classes apart from CLLocationManager implement this method):
frida-trace -U "Telegram" -m "*[* *authorizationStatus*]"
-Uconnects to the USB device.-mincludes an Objective-C method to the traces. You can use a glob pattern (e.g. with the "*" wildcard,-m "*[* *authorizationStatus*]"means "include any Objective-C method of any class containing 'authorizationStatus'"). Typefrida-trace -hfor more information.
Now we open the share dialog:
The following methods are displayed:
  1942 ms  +[PHPhotoLibrary authorizationStatus]
  1959 ms  +[TGMediaAssetsLibrary authorizationStatusSignal]
  1959 ms     | +[TGMediaAssetsModernLibrary authorizationStatusSignal]
If we click on Location, another method will be traced:
 11186 ms  +[CLLocationManager authorizationStatus]
 11186 ms     | +[CLLocationManager _authorizationStatus]
 11186 ms     |    | +[CLLocationManager _authorizationStatusForBundleIdentifier:0x0 bundle:0x0]
Use the auto-generated stubs of frida-trace to get more information like the return values and a backtrace. Do the following modifications to the JavaScript file below (the path is relative to the current directory):
// __handlers__/__CLLocationManager_authorizationStatus_.js

  onEnter: function (log, args, state) {
    log("+[CLLocationManager authorizationStatus]");
    log("Called from:\n" +
        Thread.backtrace(this.context, Backtracer.ACCURATE)
        .map(DebugSymbol.fromAddress).join("\n\t") + "\n");
  },
  onLeave: function (log, retval, state) {
    console.log('RET :' + retval.toString());
  }
Clicking again on "Location" reveals more information:
  3630 ms  -[CLLocationManager init]
  3630 ms     | -[CLLocationManager initWithEffectiveBundleIdentifier:0x0 bundle:0x0]
  3634 ms  -[CLLocationManager setDelegate:0x14c9ab000]
  3641 ms  +[CLLocationManager authorizationStatus]
RET: 0x4
  3641 ms  Called from:
0x1031aa158 TelegramUI!+[TGLocationUtils requestWhenInUserLocationAuthorizationWithLocationManager:]
    0x10337e2c0 TelegramUI!-[TGLocationPickerController initWithContext:intent:]
    0x101ee93ac TelegramUI!0x1013ac
We see that +[CLLocationManager authorizationStatus] returned 0x4 (CLAuthorizationStatus.authorizedWhenInUse) and was called by +[TGLocationUtils requestWhenInUserLocationAuthorizationWithLocationManager:]. As we anticipated before, you might use this kind of information as an entry point when reverse engineering the app and from there get inputs (e.g. names of classes or methods) to keep feeding the dynamic analysis.
Next, there is a visual way to inspect the status of some app permissions when using the iPhone/iPad by opening "Settings" and scrolling down until you find the app you're interested in. When clicking on it, this will open the "ALLOW APP_NAME TO ACCESS" screen. However, not all permissions might be displayed yet. You will have to trigger them in order to be listed on that screen.
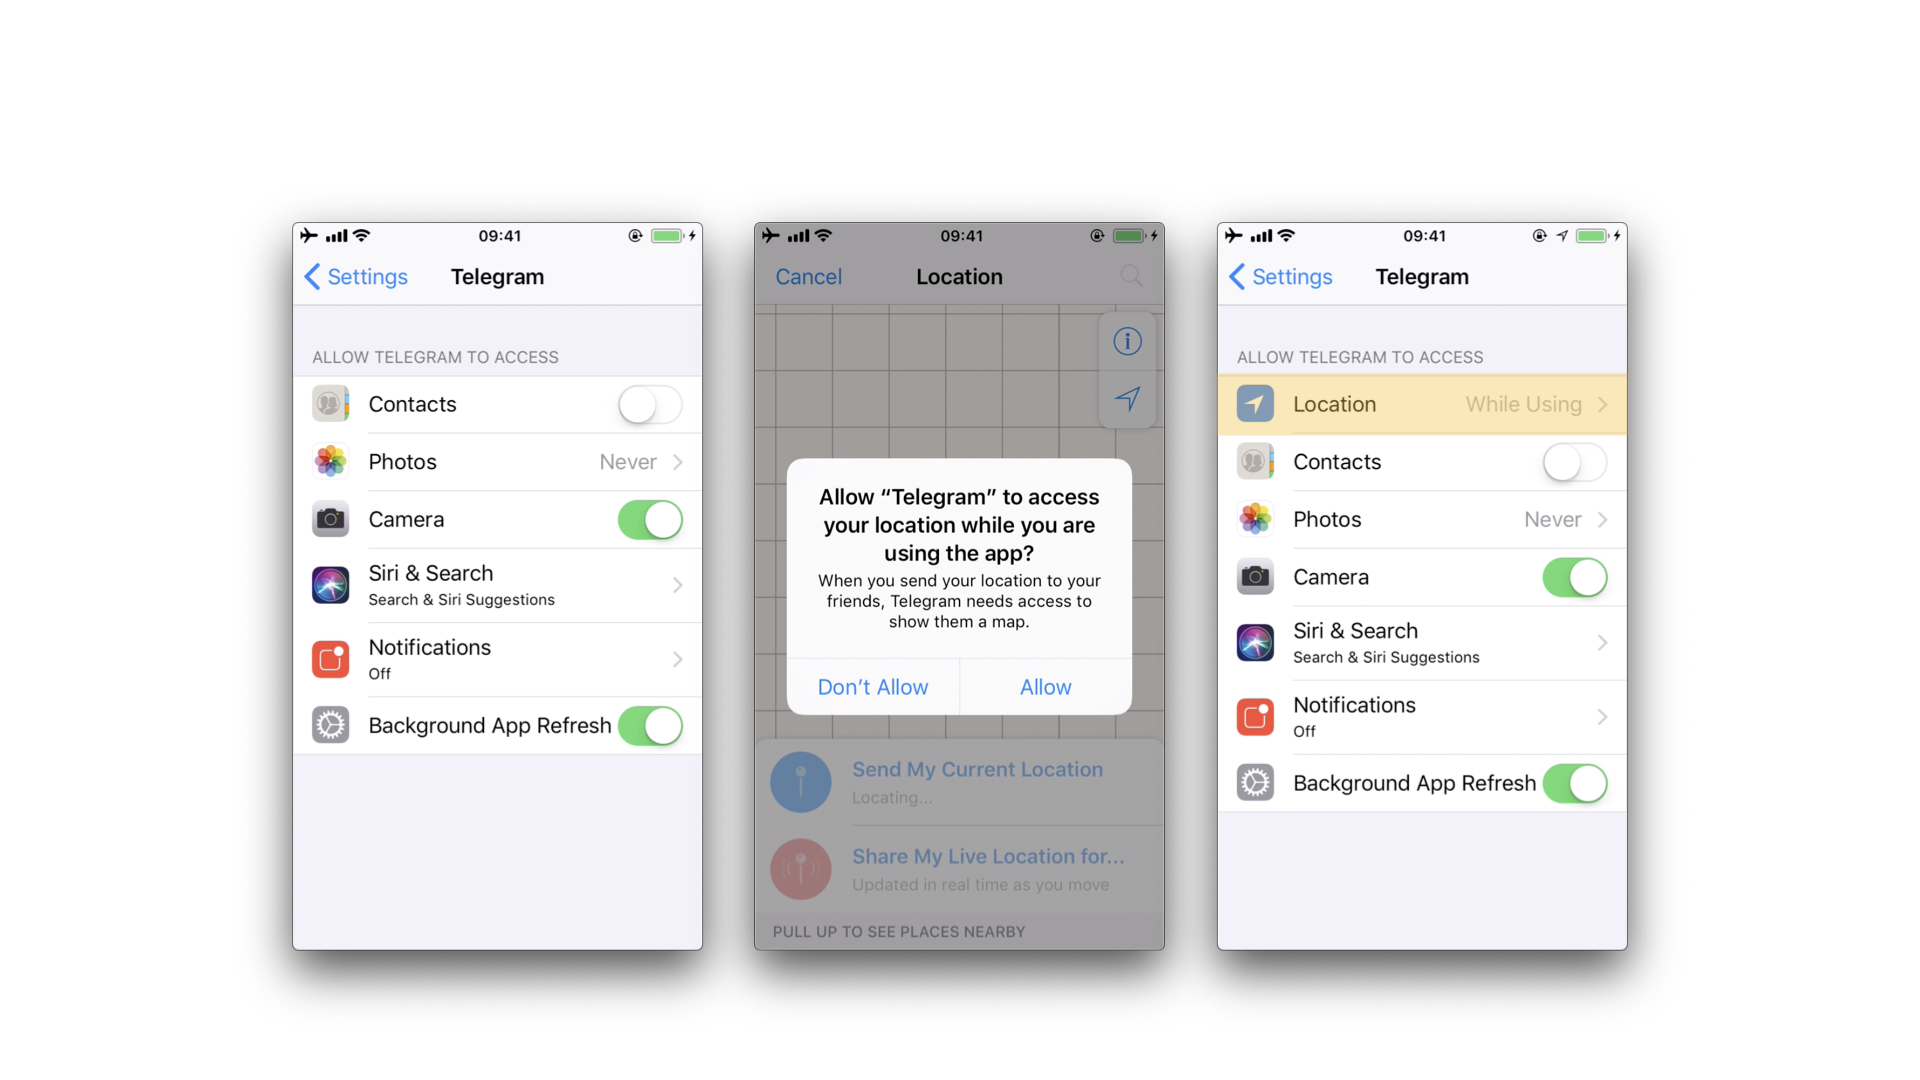
For example, in the previous example, the "Location" entry was not being listed until we triggered the permission dialogue for the first time. Once we did it, no matter if we allowed the access or not, the the "Location" entry will be displayed.